Importance of Airway, Breathing and Circulation Check

importance of airway breathing circulation

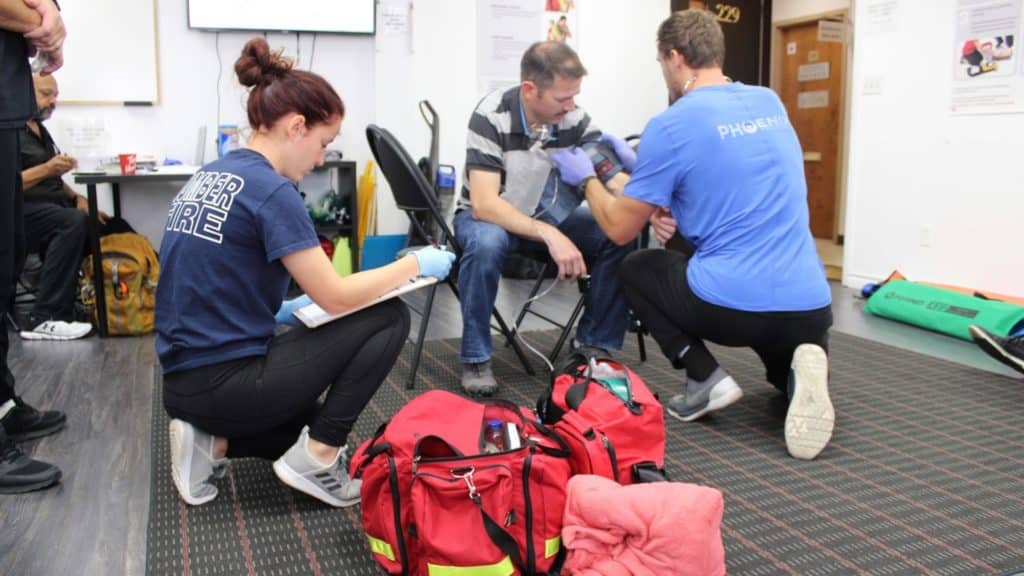
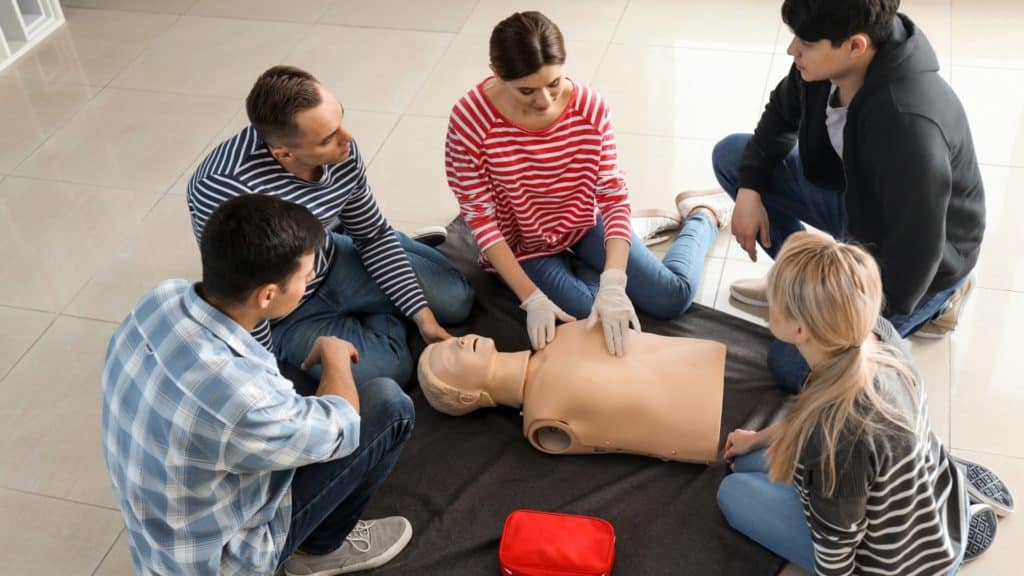
Understanding the steps to perform first aid and CPR is vital to helping preserve life and prevent further harm to someone. There are certain universal precautions used by professional rescuers when providing medical care, including personal protective equipment and a well-stocked first aid kit.

For the immediate assessment and the treatment of patients who are injured or ill, the airway, breathing, and circulation check is important.

Understanding the ABCs

One of the most common terms one hears in first aid and CPR classes is ABC – which stands for airway, breathing, and circulation. Depending on the experience of the first aider, after the ABCs have been secured, they can then focus on the additional treatments required.

Order of ABC

When assessing a person, Airway, Breathing, and Circulation are the right order to follow in emergency procedures to ensure CPR is administered correctly. Training and practice are vital to knowing and maintaining the three steps, and this is offered through various levels of First Aid and CPR courses.

In an emergency where someone has collapsed, the first step is to check the scene for safety. If the scene is safe, then you can check the victim for responsiveness. If the victim doesn’t respond, then the next step is to perform the ABCs.

A person lies on their back on a paved surface, eyes closed. Another person kneels nearby, supporting the first person's head with both hands, possibly administering aid.

Inquire about First Aid & CPR Training Course

Register for a First Aid & CPR training course! Gain life-saving skills and be prepared.

Airway

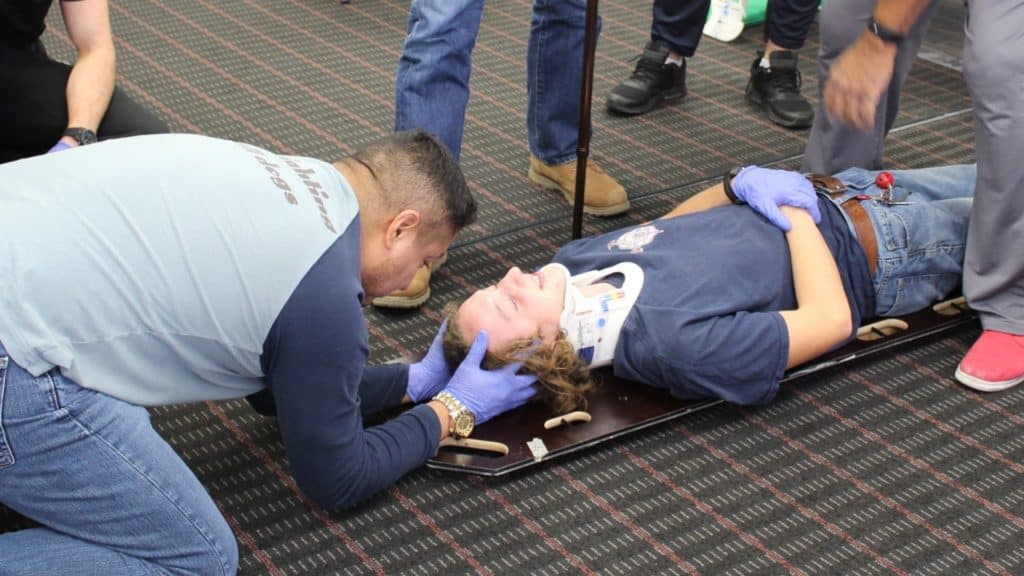
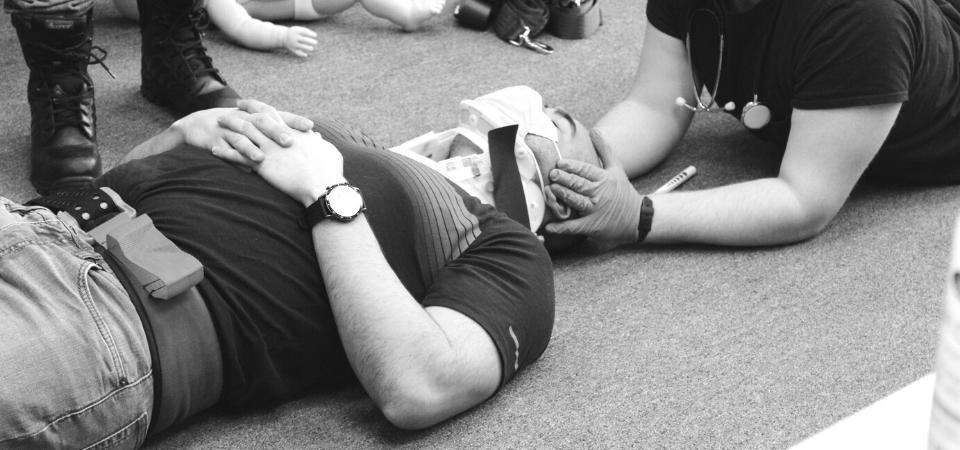
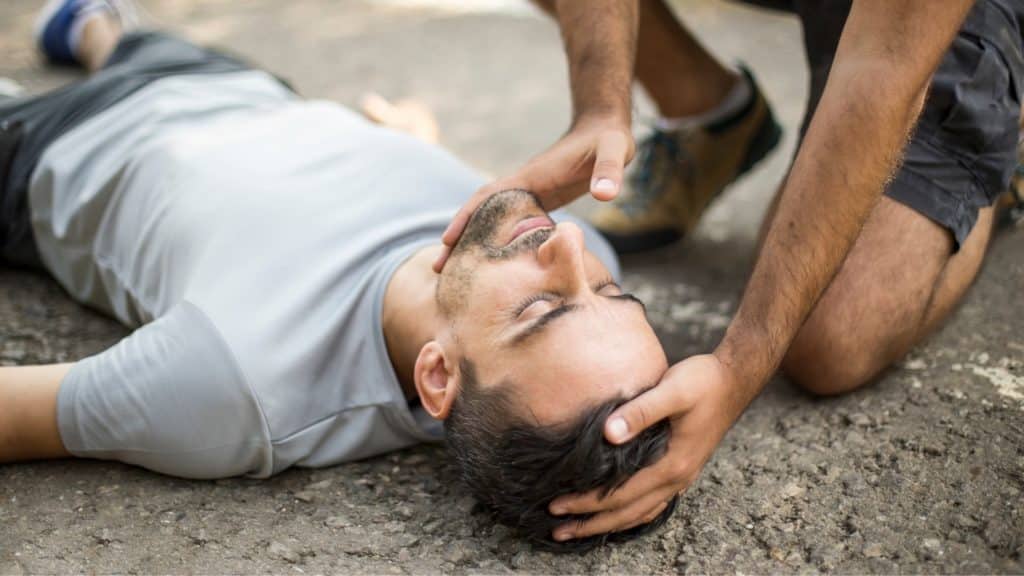
Making sure the airway is clear is the most relevant step when practicing first aid on a victim. Any obstruction can result in choking, something which is fatal. If you notice that the victim is crying or speaking, then their airway is open.

Immediately place the victim flat on their back. Open the victim’s airway by tilting back the head with one hand while lifting the chin up with the other. This is known as the head-tilt/chin-lift. This technique keeps the tongue from blocking the airway and opens up the epiglottis.

Breathing

Once the airway is clear, the next step is to determine if the victim is breathing. Here, the principle is to look and listen for breath by placing a cheek close to their nose or mouth while looking at the victim’s chest. It shouldn’t take longer than 10 seconds to determine if the person is breathing.

Sometimes a victim may show signs of breathing by gasping. This is called agonal respiration. Agonal respiration is not normal breathing and verifies that the victim is suffering from cardiac arrest.

Circulation

The last step of the ABCs is to check the victim’s circulation. This is where you check for life-threatening external bleeding. Start at the head and work your way down to the toes. If you discover life-threatening bleeding, try to control it as soon as possible.

A person with a bloody arm injury lies on the ground. Another individual wearing blue gloves applies a tourniquet to the injured arm. There is a pool of blood on the pavement nearby.

Once you complete the ABCs, it is important to call 911/EMS. If possible, try to find a first aid kit or ask a bystander to assist you.

What Next?

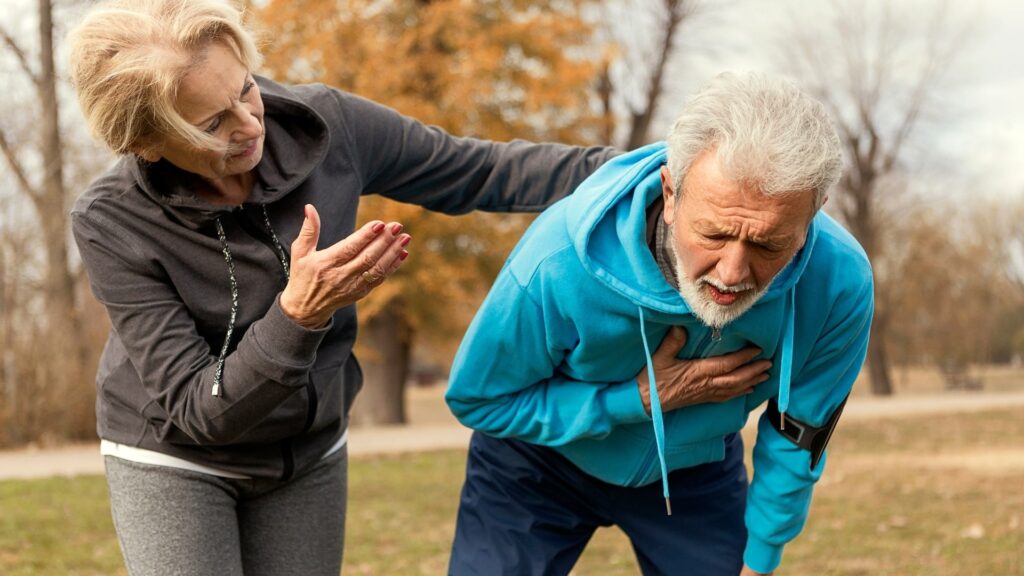
Depending on what is going on with the victim, you may need to begin providing first aid or CPR before EMS arrives. It is important to assist for the following reasons: the victim is choking or experiencing anaphylaxis, they have life-threatening bleeding or they are unresponsive and not breathing.

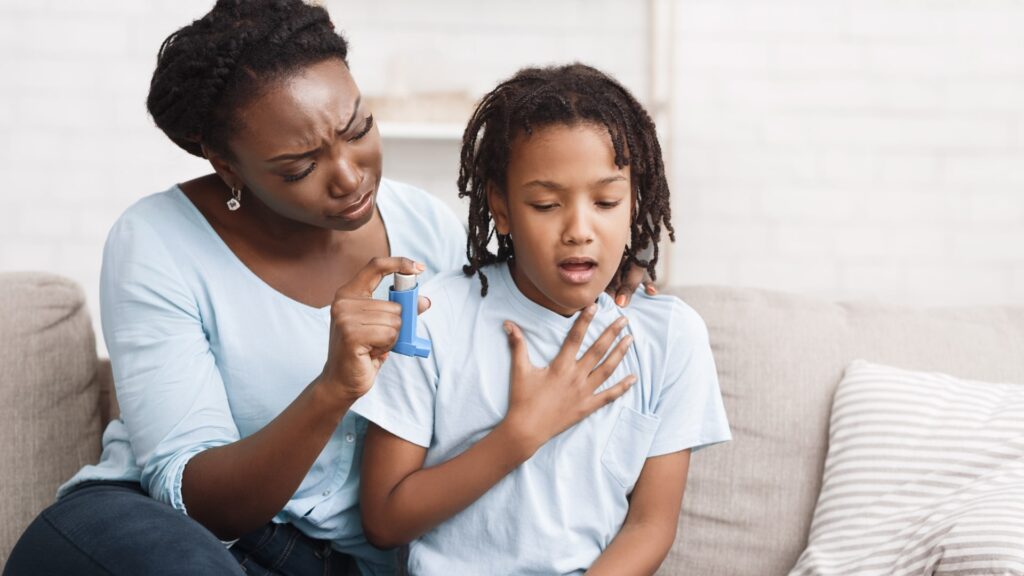
For someone who is choking, you may be required to alternate between two of the following: abdominal thrusts, back blows or chest thrusts. This is only necessary if the person is suffering from complete choking (unable to speak, cough, breathe, etc.). If the person is experiencing anaphylaxis and has an epi-pen, help them locate and use it if they need assistance.

A person in a green shirt appears to be choking, holding their throat. Another person in a blue shirt is performing the Heimlich maneuver, standing behind and applying pressure to their abdomen in a kitchen setting.

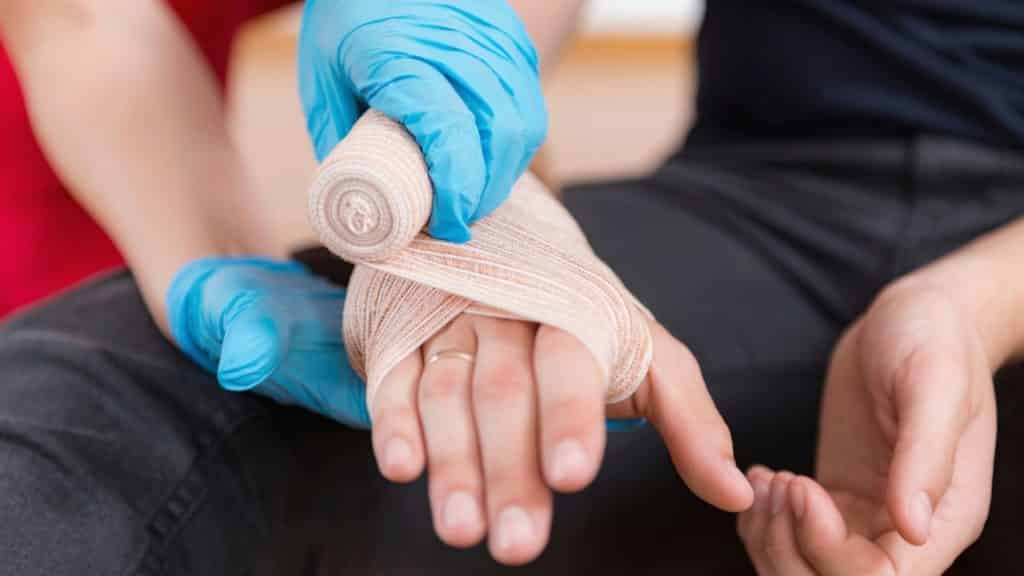
For life-threatening external bleeding, apply pressure and apply a dressing. Continue holding pressure to stop the bleed. You may need to continue adding additional dressings. If the bleeding will not stop, then it might be necessary to use a tourniquet.

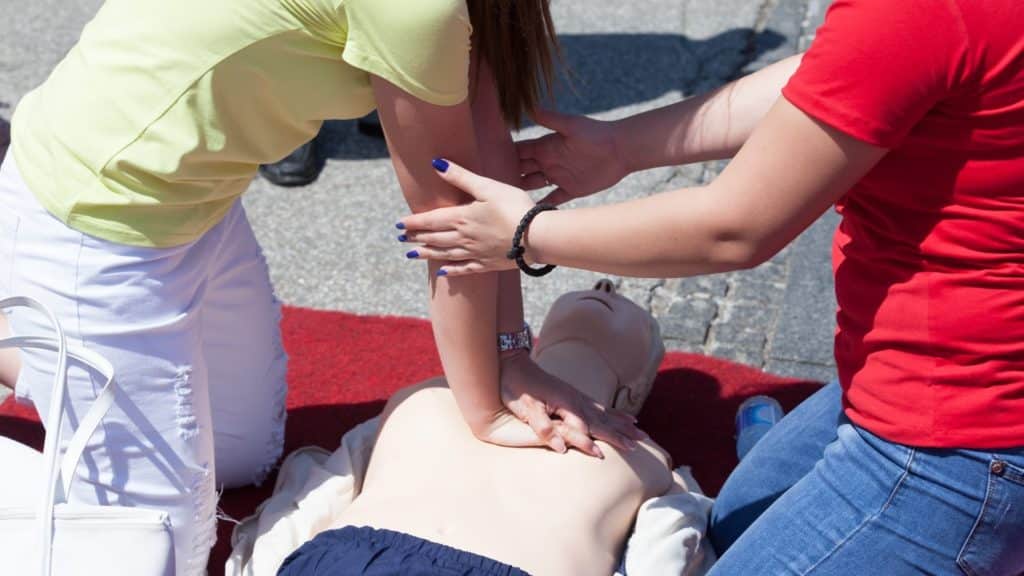
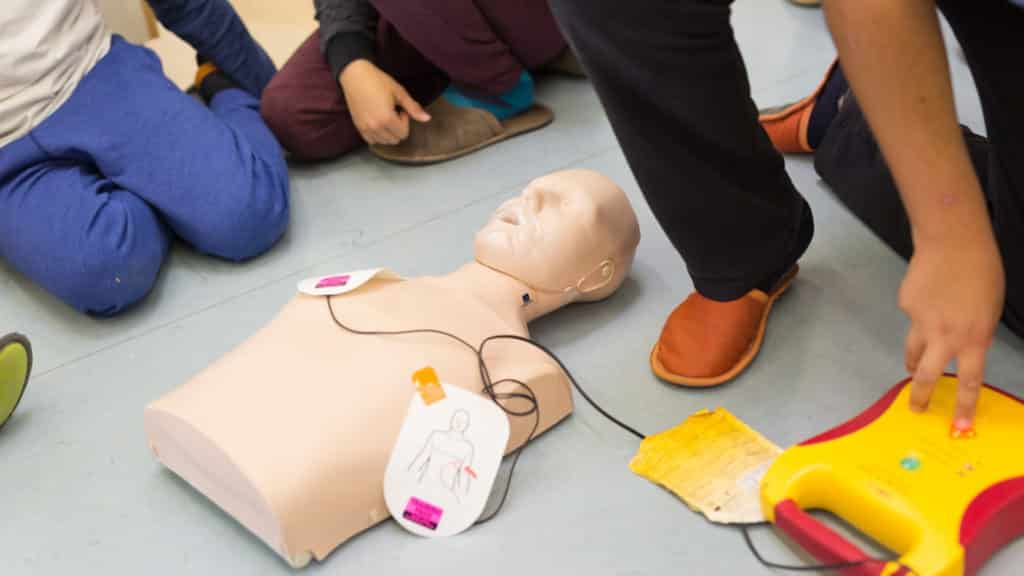
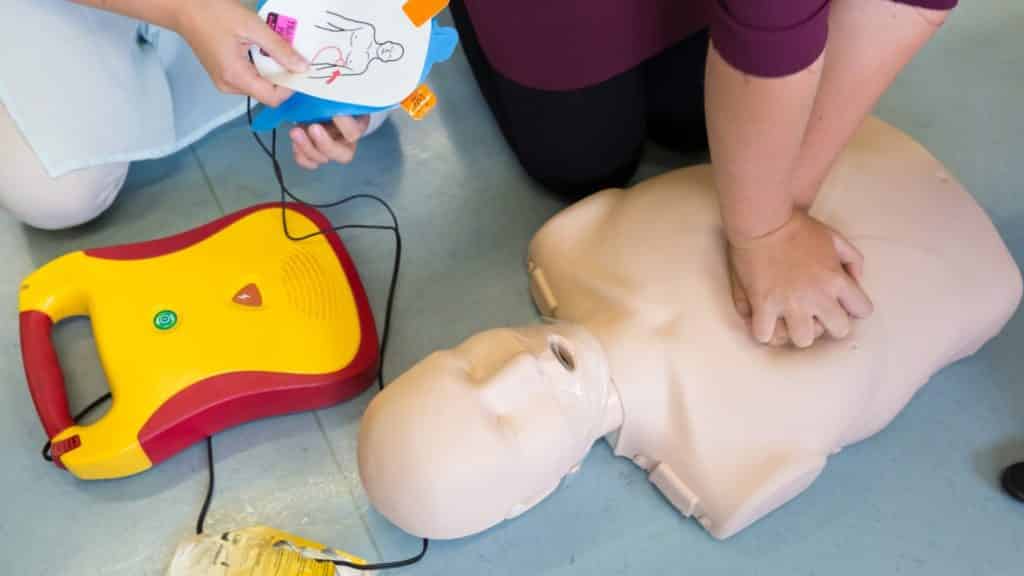
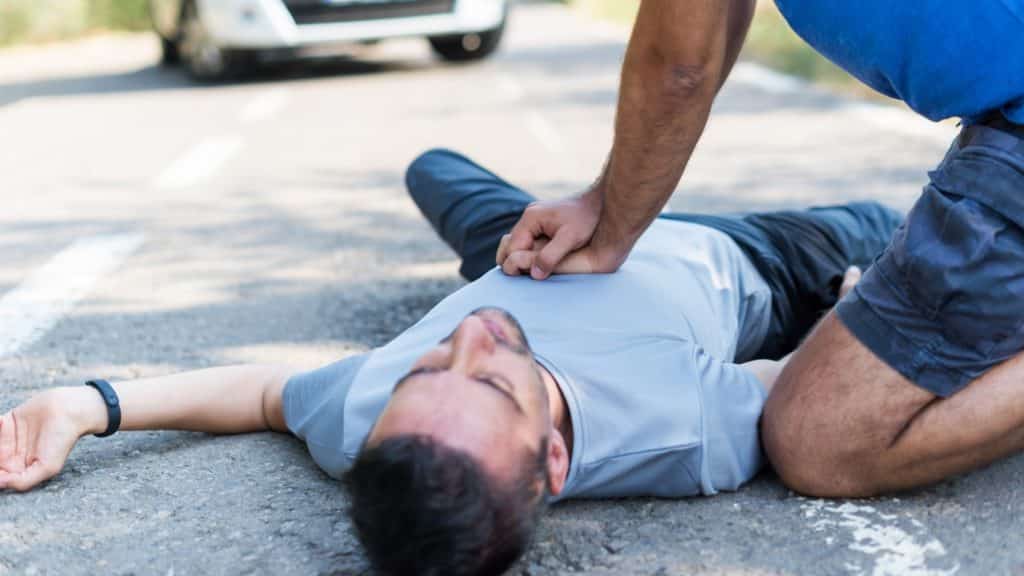
If the person is not breathing, the next step is to promote circulation so that the person’s blood can be enriched with oxygen. CPR must immediately be given. With one hand on the lower part of the person’s sternum, place the other hand directly on top. For an adult, you will need to push about 2 inches down at a steady pace. Compressions are performed at a rate of 30 for every two breaths. If both of your breaths go in, continue providing 30 compressions and 2 breaths until the person becomes responsive or EMS arrives.

A man lying on a road receives CPR from another person kneeling beside him. The scene suggests a medical emergency. A blurred vehicle is visible in the background.

Last word

In any type of incident that involves a medical or trauma emergency, a special order must be followed when offering first aid. This is referred to as the ABCs (airway, breathing, and circulation) which may be applied to diabetic emergencies, airway obstruction, respiratory failure, trauma, and overdoses. If a patient is suffering cardiac arrest, compressions are of utmost importance and performed first.

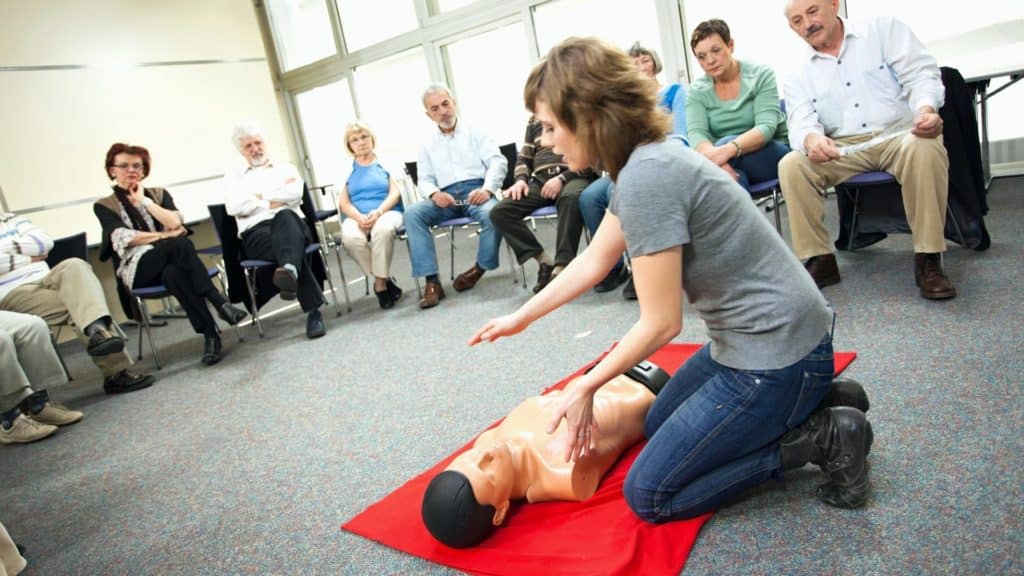
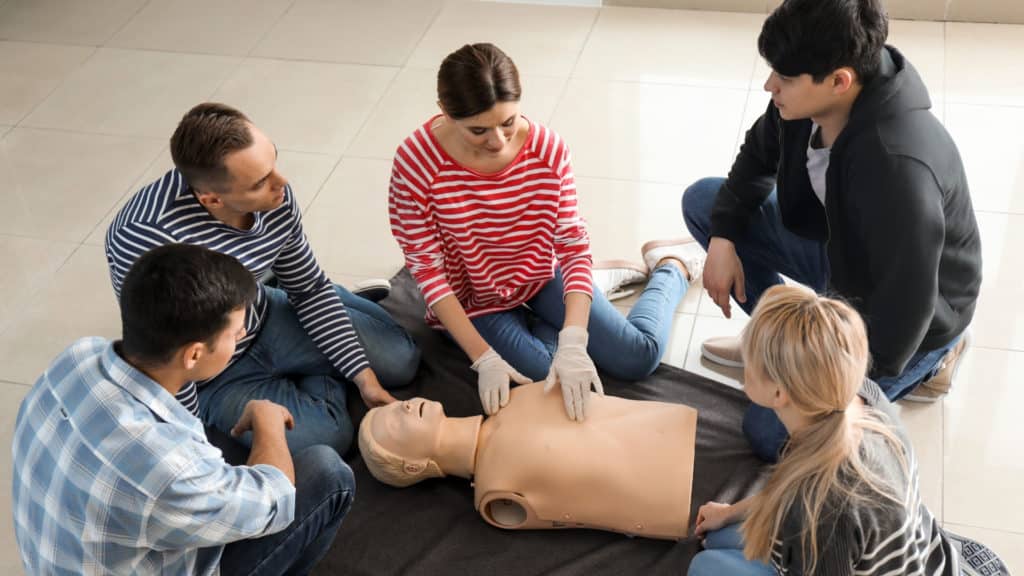
It is mandatory for people in various occupations to have First Aid and CPR training. A Canadian Red Cross course allows everyone to learn the important skills required to help people in various life-threatening situations. Learning the ABCs and ensuring that the certificate remains valid is important for anyone wanting to be prepared to help someone in any situation.

Register for a First Aid & CPR Training Course

Choose from any of our locations across Ontario and gain the knowledge and skills to save a life!

5 Reasons First Aid Is A Must For All Canadian

5 reasons first aid training is a must for every canadian

First Aid is the immediate care given to an injured or sick person, ensuring the victim is kept alive. This immediate response also makes sure they avoid future disabilities and minimize the effects of their injury or illness.

In Canada – every workplace – depending on the types of hazards, number of employees, and its distance from a place where proper medical assistance can be offered is required to provide a certain level of first aid training to its employees.

Despite the workplace regulations, here are the 5 reasons first aid training is a must for every Canadian:

infographic displaying the different reasons first aid is a must in canada

1. Becoming Confident in Caring

When faced with a work-related or other emergency, people with first aid training are better equipped to take charge of a situation to help prevent a deterioration in the condition of the victim. Even basic first aid knowledge provides enough abilities and skills to administer first aid in most emergencies. Additionally, first aid training also offers every person the boost required to get them through their daily lives in non-medical related work.

2. Training to Save a Life and Beyond

First aid training helps save lives by allowing trained people to immediately give appropriate treatment, helping to reduce the recovery time. For victims, this can mean the difference between a shorter or longer recovery time.

A first aid course teaches people to remain calm in emergencies. They also learn simple acronyms, helping them recall the steps required to ensure the victim is given the treatment required in the right order. First aid training makes everyone more confident and comfortable, giving them effective control in any situation.

An elderly woman looks at her smartphone, appearing concerned. Next to her, an elderly man is leaning back on a couch, eyes closed, with one hand on his chest.

Inquire about First Aid & CPR Training Course

Certify for First Aid training  learn skills that increase their confidence and willingness to respond to others in a crisis as you complete the course with us. Call our toll-free number to know more.

3. Offering Patient Comfort

Pain and suffering are not only felt by those patients requiring hospitalization after the first aid treatment. In some accidents, or when a patient is injured or feeling ill, knowing how to respond provides immediate relief and comfort. First aid training includes simple techniques to help relieve discomfort. Some examples of these include the correct application of an ice pack, using appropriate bandages, providing emotional support with a calm demeanor that allows patients to feel secure and less anxious.

4. Preventing Patient Deterioration

Some types of accidents and illnesses require immediate first aid care to prevent the situation from deteriorating (in some instances rapidly). People trained in first aid can provide immediate basic care by helping to stabilize a patient until the arrival of emergency medical services. During a first aid training course, trainees are taught to use basic household items in the absence of a first aid kit.

One of the most important aspects of first aid training is the collection of information about the cause of the incident and the patient’s condition. Once emergency services arrive, this information is valuable in saving time and ensuring the patient receives the correct treatment immediately. This makes someone with first aid knowledge an important person in the survival link.

Two people demonstrate CPR on a manikin lying on a red mat outdoors. One person in a yellow shirt performs chest compressions, while another in a red shirt observes closely, adjusting the technique if needed.

5. Self-care and Safety

Besides caring for others, a first aid course also teaches participants to look after themselves and to make safety a priority. This means they can keep safe while placing themselves in a position to help others.

Healthy living and lifestyle habits are ingrained, helping first aiders make the correct choices to help decrease potential risks to illnesses like heart disease. They are also taught to look out for potential hazards in their environment.

Be Prepared

The choice of first aid training depends on the course required by the individual or their employer. Whatever the course, trainees are prepared to face various situations involving emergencies, allowing them to provide rapid and knowledgeable treatment with the confidence required.

Now you are ready to register for a first aid training course! At Coast2Coast, we provide multiple training courses throughout Ontario. Take a look at our training facilities and find one close to you.

Register for a First Aid & CPR Training Course

Choose from any of our locations across Ontario and gain the knowledge and skills to save a life!

Is the EMR Exam Difficult to Pass?

is the emr exam difficult to pass

Emergency Medical Responder (EMR) courses are far more intense than First Aid CPR training. First responders are trained to provide care in a pre-hospital setting, offering professional life support. During the 8-day (80 hours) course participants cover theory and practical lessons of the different scenarios they will face. They learn how to do a patient assessment and offer life-saving care.

EMRs are crucial in assisting emergency medical providers in many situations, including accidents, life threatening emergencies,  emergency childbirth, and etc. Assistance includes helping with a patient’s resuscitation, airway management, providing first aid for wounds and broken bones, and preparing patients for transport. EMR training includes stabilizing spinal and neck injuries, offering protection from infection, controlling bleeding, and stabilizing patients suffering from hyperthermia or exposure to hazardous substances.

Taking the Exam

On completion of the EMR course, in Mississauga, for instance, candidates are required to take the examination to assess their skills. The exam is divided into two sections, the written and the practical test.

What does the practical exam consist of?

During the practical test, candidates are given two complete scenarios to treat. One consists of a medical emergency (e.i Child with asthma) and the other a trauma emergency (e.i burns to chest) which has more complications because of the nature of the injury.

There will be standardized scenarios that contain the context of what has happened to the injured individual along with all the details for the vitals in order to make the scene more realistic. Example below:

“It’s midday on a Saturday in the fall, when you respond to an emergency about a pedestrian struck by a vehicle on a busy street. As you approach the scene, you see that the police have blocked off the street and rerouted traffic; the scene is safe. Upon reaching the female patient, you notice she is not moving. She appears to be in her mid-50s. The police are speaking to witnesses; however, information is limited. The patient is supine on the street, and police state she is approximately 30 feet from where the impact occurred.” (Reference: Canadian Red Cross Society)

A person wearing a neck brace is lying on a backboard while another person kneels beside them, holding their head. Several people are standing nearby, all wearing gloves, on a carpeted floor.

Inquire about EMR or FR Training

EMR and FR training prepares students who are/wish to work in a first responder role! Call us, toll-free, to learn more about our Emergency Medical Responder and First Responder training courses.

Scenarios differ in their complexity and the intervention that is expected from the professional responder to perform. However, regardless of the scenario, candidates are expected to successfully demonstrate:

  • Scene Assessment
    • Environment
    • Hazards
    • Mechanism of Injury
    • Number of patients 
    • Resources
    • Personal Protective Equipment
  • Primary Assessment
  • Secondary Assessment
    • SAMPLE questions
    • Pain Scale (OPQRST)
  • Vital signs
    • Pulse
    • Respiration
    • Blood Pressure
    • Pupils 
    • Skin
    • Level of Responsiveness/ Glasgow Coma Scale 
    • SpO2
    • Body Temperature 
    • Blood Glucose Level
  • Head to toe physical assessment
  • Ongoing checking of vitals

Depending on the scenario, there will be at least one injured individual and one bystander present. 

Candidates will be completing the scenario in pairs, that is there will be responder 1 and responder 2. The former is expected to take the lead while the latter will provide assistance as some of the interventions may require more than one responder. 

Three people in a room during a medical training exercise. Two individuals in blue shirts assist a seated man, wrapping a bandage around his forearm. Medical equipment and bags are on the floor. This appears to be a first aid or emergency scenario practice.

What does the written test consist of?

In a test that encompasses the whole textbook, candidates are called to answer 100 questions. The sections candidates are questioned on include:

  • Infection control
  • Anatomy and physiology
  • Assessment of patients
  • Airway management
  • Circulatory emergencies
  • Shock
  • Hemorrhage and soft tissue trauma
  • Musculoskeletal injuries
  • Chest abdominal and pelvic injuries
  • Head and spinal injuries
  • Acute and chronic illnesses
  • Poisoning
  • Environmental illness
  • Pregnancy, labour, and delivery
  • Special populations
  • Crisis intervention
  • Reaching, lifting, and extricating patients
  • Transportation
  • Multiple casualty incident
  • Pharmacology
  • Marine environment
  • Workplace

Questions based on patient care are focused mostly on adult and geriatric care, but also include pediatric care.

A person lying on the floor with eyes closed, wearing a watch. Another person, wearing a stethoscope, gloves, and a medical mask, is supporting their head and checking their breathing. Medical equipment is visible nearby.

Questions About FR or EMR?

If you have any questions regarding an upcoming FR or EMR course, please email us. Our customer service team will respond as soon as possible.

Preparing for the EMR Exam

Before taking the exam, participants are required to have 100% attendance of the course. They must pay close attention during the course because this is the first step in helping prepare for both the practical and cognitive sections of the exam. All the topics presented by the instructors are critical, and participants are encouraged to ask questions. 

Studying is important for passing the exam, and the notes are particularly useful. The questions are multiple-choice, and keep in mind that there is only one correct answer.

Certification

Once emergency medical responders (EMRs)receive their certification, they can save lives by providing immediate aid and interventions for patients during the time before paramedics and more advanced care arrive at the scene. They are also present during the transportation of patients to a hospital.

Their training teaches them to quickly assess a patient and determine the best way to treat them. EMRs also play a vital role in relaying important information concerning the patient’s condition and the initial care they provided to nurses and doctors upon arriving at the hospital. They also clean and disinfect any equipment or supplies that they use while treating a patient.

Once a candidate successfully demonstrates all the above skills in both the multiple-choice and practical scenarios, they are issued their EMR certificate. The certificate is valid for 3 years. Recertification of this program consists of a 4 day (40-hour) session to review all skills and knowledge but the pace will be much faster than the original course.

Locations to Take the Training

Coast2Coast First Aid offers the Emergency Medical Responder course at our locations across Ontario:

North York – #216, 180 Steeles Ave. W, Thornhill, Ontario

Toronto – 635A Bloor St. W, Toronto, Ontario

Markham – #2, 1080 Tapscott Rd, Markham, Ontario

Brampton – 83 Kennedy Rd. S, Brampton, Ontario

Hamilton (Stoney Creek) – #104, 43 Keefer Court, Hamilton, Ontario

London – #304A, 717 Richmond St, London, Ontario

Ottawa – 385 Rideau St, Ottawa

If you have any questions regarding enrollment, please do not hesitate to contact us toll-free at 866-291-9121 or via email at [email protected].

Register for FR or EMR Training

Ready to register for your professional responder training course? Follow the links below to get started. We offer First Responder, First Responder Recertification, Emergency Medical Responder, Emergency Medical Responder Upgrade and Emergency Medical Responder Recertification.

Can You Get a Security License Online?

can you get a security license online

Anyone who works as a security guard or private investigator in Ontario requires a valid security license. You may complete a security training course in person, but can you get a security license online?

It’s common to apply for your license by mail, but the fastest way to get your license is to apply online.

What do you need before you apply?

Before applying for a security license, you need to prove your eligibility. Besides being 18 years and older, you must also be legally entitled to work in Canada.

The requirements also stipulate that you have a clean criminal record and must have completed the mandatory basic training course and passed the test for security guard training. Once completed and passed, the mandatory test number is required for the license application.

A security guard wearing a black jacket and cap speaks into a walkie-talkie. He stands next to parked cars on a cobblestone street, with buildings in the background.

Register for Security Licensing Course!

Take the first vital step towards an impactful career in security by registering now to obtain your Ontario security license, enabling you to play a pivotal role in maintaining safety and protection within your community.

What must you submit with your application?

Submit the following documents with your application for your license:

  • Your testing completion number
  • Security guards and private investigators with an existing license from another province must provide a copy of both sides of their license.
  • All applications need a passport-quality photo, and photos are only valid for 6 years. If the photo on file has expired, you need to submit a new one. Photos cannot be a selfie, a photo altered in any way, or a photo from identification documents or passports.  The photo must be clear and sharp, have uniform lighting, with the applicant facing the camera with a neutral facial expression.
  • You require two identification documents – one that proves your identity and one that proves your eligibility to work in Canada. The documents you choose must have your full legal name, date of birth, and photo, proving your identity. Your Canadian Birth Certificate or Certificate of Canadian Citizenship are the most usual documents presented for work eligibility, but others include Permanent Resident Card, Naturalization Certificate, valid work permit, Certificate of Indian Status, etc.
  • Documents that are not accepted include your health card, social Insurance number (SIN) card, firearms license, etc.
  • Find a guarantor who has known you for at least two years who will fill the Guarantor Information Form and sign it. A guarantor must be at least 18 years of age, and accessible by phone. If he hasn’t known you for at least 2 years, he should be able to confirm your basic personal information.
  • Submit the appropriate information for your license type. 

A police officer stands near a barrier on a city sidewalk, wearing a uniform with a cap and sunglasses. People walk by, including a person in a white jacket and another in a hat. The scene is in black and white.

Register for an Online Training Course

The online security license course is a 33.5 hour training. This course will contain all of the material taught in an in-person training session, but can be completed in the comfort of your own home. Registering for the online security license course is easy.

How to get an online license?

An online application is always faster. Read these eligibility and application requirements to ensure you submit the papers correctly for your online application. Expect it to take up to 10 business days for processing and approval.

On approval, your new license card is sent by mail, and you should receive it within eight weeks. Your license is also available to download a digital copy and to print.

For your online license you need:

Note: If you are renewing your existing license, you can renew up to 90 calendar days before it expires.

A security guard in a light blue uniform and sunglasses stands with arms crossed. He is smiling. In the background, there are modern buildings, a pool, and a grassy lawn with a palm tree.

Conclusion

Every security guard or private investigator license expires on the date that is linked to the date of birth of the applicant. The first time it is issued, the license expires two birthdays after the day it is issued. For example: if the applicant’s birthday is December 15th and the license was issued on October 1st, 2020, then the license will expire on December 15th, 2021.

Thereafter, when the license is renewed, the renewal date will always be two years in the future and linked to your date of birth.

How to Recertify Your First Aid & CPR in Mississauga

how to recertify your first aid cpr in mississauga

If you live in Mississauga, Ontario, then you don’t have to go to the neighbouring city, Toronto, to recertify your First Aid CPR Certificate. At Coast2Coast, we have a First Aid training facility in the city of Mississauga where various courses and recertification training programs are run.

Here is our complete guide on how to recertify your First Aid & CPR certificate in Mississauga.

Mississauga First Aid & CPR/AED Recertification

First Aid Training & CPR courses in Mississauga prepare you to help others. These courses are aimed to provide you the knowledge to help others in emergencies. These life-saving skills are invaluable because you are given the confidence to help anyone in a situation, whether they are involved in an accident or face a sudden illness.

Who is eligible for the recertification course?

First Aid and CPR/AED certificates from the Canadian Red Cross expire after three years. You need to recertify your current certificate before it expires, otherwise, you need to do the full course again.

A Canadian Red Cross certificate example under the name "John Smith", certified in Standard First Aid & CPR/AED Level C (Blended). Includes certificate number, expiry date, issue date, and issuer location (ON  c). Coast2Coast First Aid and Aquatics Inc. website is listed.

Recertification courses allow you to renew your training quickly and economically compared to the full training courses.

The criteria required to enroll depends on the level of training required. However, for all courses at Coast2Coast, including the one in Mississauga, you can only do the recertification certificate if you have a valid (not expired) Canadian Red Cross certificate.

If you have a CPR/AED Level C, there are no restrictions on how many times you can be recertified. This means that you can take a Recertification course again and again. On the other hand, the Standard First Aid & CPR/AED Level C can only be recertified once. After the first recertification, you need to take a full course again. Therefore, you are required to alternate between a full course and a recertification course. This is the best way to ensure you refresh and memorize your life-saving skills, while also learning about all the new techniques practiced since your last training.

Stay Certified, Stay Prepared in Mississauga!

Renew your skills with our recertification course and ensure you’re up-to-date with the latest techniques and protocols. Don’t let your certification lapse—our expert instructors are here to help you refresh your knowledge and confidence.

What do you learn in the recertification course?

In the Coast2Coast recertification course, your knowledge is renewed and you are offered the chance to refresh your skills, ensuring you are always ready to help others.

During the Mississauga recertification program, your instructors highlight any changes in the curriculum. Usually, changes and new additions are made to the curriculum every three to five years. These changes alter how some things are done, and the recertification course remains critical to keeping you up-to-date with how to treat people and save lives.

A person is treating a bleeding wound on another person's arm using a piece of white gauze. The injured person wears a blue fabric and has visible tattoos on their forearm. The focus is on the care process.

What do you need for the Mississauga Recertification?

The only prerequisite for the Mississauga Recertification Course is a valid Canadian Red Cross Certificate. Below, you can read more about training courses that can or cannot be recertified:

For the Standard First Aid & CPR Recertification Course:

Your current valid certificate must be from the full training course from either the traditional two-day training or the Online Blended training. If your current certificate says “Recertification”, you DO NOT qualify for a Recertification course and you must register for the full course or the Online Blended course.

For the CPR/AED-C Recertification Course:

Unlike Standard First Aid, CPR/AED-C CAN be recertified as many times as you like.

For the CPR/AED-A Recertification Course:

CPR/AED-A certificates CANNOT be recertified.

For the Emergency First Aid & CPR Recertification Course:

The Emergency First Aid & CPR-C CANNOT be recertified.

Training Course Duration

Depending on whether you want a blended or traditional course, the time needed to complete the content is the same. At Coast2Coast, we are currently offering the Online Blended format of the course. In the blended course, you have an online component consisting of theory, knowledge, and interactive activities. At a later date, you will attend a shortened in-class session to practice hands-on skills. On completion, you receive your certificate.

A woman in a red shirt kneels beside a person lying on the floor, checking their neck. Three other people sit nearby watching, all wearing gloves, in a first aid training setting.

Your online portion must be completed before your in-class date.

CPR-A – 3 hours online and 3 hours in-class

CPR-C – 3 hours online and 4 hours in-class

Emergency First Aid & CPR-C – 4 hours online and 5 hours in-class

Standard First Aid & CPR-C – 8 hours online and 8 hours in-class

Marine Basic First Aid & CPR-C – 8 hours online and 8 hours in-class

Get Registered for your Recertification Training in Mississauga

Ready to register for your Recertification course in Mississauga? Get started now! If you do not qualify for the Recertification training, check out our upcoming first aid training facility in the city of Mississauga. Regardless of your choice, you will learn amazing life-saving skills and earn a WSIB approved certificate, valid for 3 years. See you soon!

Register for First Aid Training

Register today for a First Aid Training course and learn how to deal with emergencies and keep your loved ones safe! Check out our facilities and book your spot now.

What is Asked During a First Aid and CPR Test?

what is asked during a first aid and cpr test

Choosing the right First Aid and CPR class is vital to ensure that your level of training matches you or your employer’s requirements. During your training, all the topics required are covered and you will receive hands-on training.

To pass the First Aid and CPR course, you are asked to take and pass a test. There are two sections to the test; the first is a written one with multiple-choice questions and the second is the practical examination.

Are you worried about what is asked during a First Aid and CPR test? Read on to feel confident!

Levels of First Aid and CPR Training

There are multiple levels of First Aid and CPR training. Each level has a specific test that goes along with it as they each provide different life-saving skills. Some of the course material does overlap between courses. For example, all of the material taught in CPR/AED Level C is also taught in Emergency First Aid and Standard First Aid. As you increase your level of training, you learn more skills. Here are the levels of training we provide at Coast2Coast:

  • CPR/AED Level A – learn how to assist adults only. This includes CPR, AED, shock, choking, stroke, life-threatening bleeding and more.
  • CPR/AED Level C – learn how to assist adults, children and infants. This includes CPR, AED, shock, choking, stroke, life-threatening bleeding and more.
  • Emergency First Aid & CPR/AED Level C – the lowest level of First Aid available at Coast2Coast, typically for people in low-hazard environments. Includes all of the information of CPR/AED Level C as well as wound care.
  • Standard First Aid & CPR/AED Level C – the most popular level of First Aid available. This 16-hour course covers all information from Emergency FIrst Aid & CPR/AED Level C, but also includes environmental illness, poisons and more.
  • Marine Basic First Aid – this is the highest level of First Aid training that is offered at Coast2Coast. It covers all of the material in Standard First Aid & CPR/AED Level C, but includes additional information regarding marine safety. This course is typically taken by students who work in the marine industry.

Coast2Coast has 24+ locations across Canada; for instance, if you are in the GTA area, you can attend a class in Mississauga, Brampton, Etobicoke, etc. We make sure to have a facility next to your area to stay closer to our community.

Practical Examination

The practical portion may seem intimidating, but if you pay attention to your instructor, you should have no issues! During a First Aid & CPR training course, there are many topics which are discussed. The practical examination is scenario-based. Here, candidates are told by the examiner what the problem with the person is, and they must perform various life-saving skills such as CPR, AED, bandaging and more. Candidates are graded throughout the day according to, for example, the way CPR is performed, the timing, and how the various techniques are executed. Examiners also note if the candidates perform the emergency action steps of Check, Call, and Care.

Students are also tested on how well they perform other skills such as choking. Can you demonstrate the various methods used to assist someone who is choking? Understand the use of back blows, abdominal thrusts and chest thrusts according to the Canadian Red Cross recommendations. This includes infant choking. The care you provide for a choking infant is different from an adult or child.

In addition to CPR and choking, many students must demonstrate wound care and splinting. Showing how to use triangular bandages for broken arms to life-threatening external bleeding is an important part of First Aid training.

To ensure you pass the practical examination, be sure to pay close attention. The practical portion may seem intimidating, but your instructor will walk you through everything. If you are ever confused, please ask questions! Instructors are there to help you. Their goal is to provide you with the skills and knowledge to leave feeling confident to save a life if needed.

Inquire about First Aid & CPR Training

Ready to start your First Aid and CPR training? Call our toll-free number to learn more about upcoming training courses near you!

Multiple Choice Test

At the end of your course, you will need to complete a multiple-choice test. The questions in the multiple-choice test depend on the course as followed:

  • CPR/AED test candidates are asked approximately 10 questions
  • Emergency First Aid test candidates are asked approximately 20 questions
  • Standard First Aid test candidates are asked approximately 30 questions

Participants require a score of 75 percent to pass the First Aid course.

A person holds a purple pen, poised to write on an open document. The paper has text and some highlighted sections. The person's sleeve is beige, suggesting casual attire.

Multiple-Choice Questions

Being prepared for certification testing requires some preparation. This is done by carefully studying the course material and paying attention during the course. These are examples of the things asked during the multiple-choice exam:

Acronyms

What is RICE?

Rice is the popular acronym for treating sprains, strains, dislocations or fractures. If you notice swelling, bruising, bones sticking out of the skin, etc., then you may need to apply the RICE method.

  • Rest – ensure the person rests in a comfortable position
  • Immobilize – try not to move the injured area as much as possible
  • Cool – it is important to keep the injured area cool for about 20 minutes every hour
  • Elevate – keep the injured area elevated unless it increases the pain

Boost Your Life Saving Skills

Join over 150,000 people this year and learn First Aid and CPR skills at Coast2Coast!

What is SAMPLE? 

This is the acronym given to the steps commonly used to question a patient offering the first aid worker a better understanding of what is going on. It is important to gather this information so you can treat the patient accordingly. This is part of your secondary assessment and should be done after life-threatening conditions have been taken care of.

  • Signs/symptoms
  • Allergies
  • Medication
  • Past Medical History
  • Last oral intake (this is food or water)
  • Events leading up to the incident

Once you finish asking SAMPLE questions, you can check the patient’s vital signs. This includes level of responsiveness, how they are breathing and how their skin is reacting (wet, dry, colour, temperature). After completing vitals, you may perform an injury check. This is where you can identify injuries that were not found during your primary assessment.

ABC

In the world of first aid and CPR, ABC is the most popular acronym.

  • Airway – ensure the patient’s airway is open. If they are unresponsive, you can perform a head-tilt/chin-lift. If they are speaking, crying, or moaning, then their airway is open.
  • Breathing – watch their breathing for about 10 seconds. You can do this by placing your head near their mouth (to hear or feel breaths) and looking down towards their chest (to see if their chest rises and falls).
  • Circulation- check head to toe for any life-threatening bleeding.

If the person is occasionally gasping for air, they may be experiencing a reflex called “agonal respiration.” This is irregular and you should provide care as if the person is not breathing.

Learn additional life-saving acronyms in a First Aid & CPR training course!

FAST

The acronym “FAST” is used to determine if someone is suffering/has suffered from a stroke. 

  • Face – is there numbness or weakness (specifically on one side) in the face?
  • Arm – is there numbness or weakness (specifically on one side) in the arms?
  • Speech – trouble speaking or understanding others, loss of speech, etc.
  • Time – call 911/ems as soon as possible (and get an AED)

A group of people is practicing CPR on a training mannequin. The mannequin has defibrillator pads attached to its chest, and a defibrillator device is placed nearby. The focus is on learning emergency response skills.

Level of Consciousness

LOC or Level of Consciousness assessment is important in emergencies because it helps responders take the right course of action required during an emergency.

Ratio of CPR

Cardiopulmonary resuscitation or CPR is vital for people not breathing normally. Test participants are quizzed on how it is administered and whether it must be applied before or after calling emergency services. They are also questioned on the ratio of chest compressions, and how they differ if there is two-person or one-person CPR for adults, children and infants.

When providing CPR, the ratio of compressions to breaths is 30:2. Continue providing CPR until help arrives or until you are too tired to continue. If you are alone, call 911 and get an AED before starting CPR. If someone else is with you, ask them to call 911 and get an AED while you begin your assessment and CPR.

CSM

Assessing pain and pressure areas in a patient, even if they cannot communicate this, can be assessed by noticing several behavioural patterns.

  • Circulation
  • Sensation
  • Movement

A group of five people sitting on the floor in a circle, practicing CPR on a mannequin. The instructor wears gloves and demonstrates chest compressions. The participants watch attentively. They are on a tiled floor with casual attire.

Don't Wait for an Emergency to Strike!

Get trained in First Aid and CPR today.

Summary of Important Concepts in First Aid and CPR Course

Chapter 1 The Red Cross

Regarding the fundamental principles of the International Red Cross, several key values align with the core of their noble mission: “Imagine a powerful force of compassion, unity, and aid, working tirelessly to provide help where it’s needed most.”

Principles

While studying the first chapter of the Red Cross Comprehensive Guide, make sure to go through the seven principles;

  1. Humanity: At the heart of the Red Cross movement is an unwavering belief in the inherent worth of all human beings. It is the realization that, regardless of our differences, we all have a common bond as part of the global family. The movement seeks to alleviate suffering and promote dignity through acts of kindness and compassion.
  2. Impartiality: Imagine a world where help is provided without prejudice or discrimination. That’s what the Red Cross movement stands for. It is based on the principle of equity and ensures that assistance is provided solely based on need without favour or bias. This is a potent reminder that compassion knows no boundaries and treats everyone equally regardless of background.
  3. Neutrality: In a world filled with conflict and division, the Red Cross movement embodies the value of neutrality. As guardians of peace and goodwill, it remains impartial on political, religious and ideological matters. Moreover, neutrality allows the movement to act in difficult situations, promoting trust and respect while reaching out to those in need.
  4. Independence: Imagine an organization free from outside influence and guided only by its humanitarian mission. This independence allows the Red Cross to act on its principles without being swayed by external pressures. This is a critical aspect of ensuring that the organization can autonomously serve humanity and make decisions in the best interests of those it serves.
  5. Voluntary Service: The Red Cross thrives on the spirit of voluntary service in which individuals selflessly give their time, skills and energy to help others. Volunteers are the movement’s lifeblood, playing a vital role in providing first aid and resuscitation, supporting communities in crisis, and spreading the message of humanity.
  6. Unity: Imagine a global network of individuals, organizations, and societies united under a common mission. The Red Cross expresses this remarkable unity by bringing together different cultures, backgrounds and perspectives. Through collaboration and cooperation, its impact is amplified and acts as a powerful force for good in a world that craves solidarity.
  7. Universality: The International Red Cross sustain that all societies have equal status and share similar responsibilities and duties in helping others.

These core principles guide the International Red Cross and shape its actions, inspiring millions to join its humanitarian causes. They represent the essence of compassion and remind us that together we have the power to change the lives of others positively.

Symbols

Red Cross Symbols

The International Red Cross and Red Crescent Movement has three official symbols: Red Cross, Red Crescent, and Red Crystal. All three symbols have the same meaning and are considered equivalent under international law. Each country chooses one of these symbols to represent their activities and help identify military medical services in armed conflicts. The emblems protect Red Cross personnel who provide assistance and protection in wars.

Courses Held Every Week!
+ 0

Chapter 2 Responding to Emergencies:

Chapter 2 of the Comprehensive Guide for First Aid and CPR by the Red Cross focuses on responding to emergencies and cover some important topics for you to know before sitting for the First Aid/CPR test.

This chapter presents the foundation for understanding the ethical and practical aspects of providing effective and timely first aid.

Obtaining Permission

As a First Aider, obtaining permission to provide assistance is crucial. You must remember that every person has autonomy and the right to make decisions about their well-being; therefore, as a future first aider, you must respect it. Before initiating any medical intervention, and if it is possible, the first aider must always seek consent from the patient. You can obtain permission from the patient by explaining the situation and focusing on the potential risks and benefits involved. If the injured patient cannot communicate or is unconscious, consent is implied, and as a first aider, you can proceed with the necessary assistance.

Chain of Survival

The chain of survival concept represents a series of critical actions that, if performed on time and following the sequence, can significantly improve the chances of survival for someone experiencing a life-threatening emergency.

Four Links

The chain of survival consists of four links: Early recognition and activation of emergency medical services (EMS), early cardiopulmonary resuscitation (CPR), early defibrillation, and early advanced medical care.

Early recognition and activation of EMS points out the importance of recognizing the need for medical assistance and alerting emergency medical responders on time. As a first aider, you will need to know the signs of a medical emergency and the need to ask for professional medical assistance.

Cardiopulmonary resuscitation (CPR) is a life-saving technique that helps maintain the blood flow and oxygenation to vital organs until advanced medical care arrives. Providing early CPR could be crucial in saving a patient. As a first aider, you will learn different CPR techniques, including chest compressions and rescue breathing.

The third link is early defibrillation. As a first aider, you will learn how to use an automated external defibrillator (AED) to restore a normal heart rhythm in a patient with cardiac arrest. AEDs can be found in several locations in your community and are user-friendly devices that can make a difference in an emergency.

The fourth link is early advanced medical care. This link refers to transferring the patient to a healthcare facility for specialized medical treatment. As a first aider, you can aim to stabilize the patient in an emergency, but still, the individual must be revised by professionals to provide comprehensive treatment.

Roles and Responsibilities of a First Aider

As a first aider, you will undergo specific training to provide immediate emergency assistance. Your role will be vital in stabilizing an injured person’s condition until professional medical help arrives. In general, first aiders prioritize their safety and the safety of others while assessing an emergency, providing immediate assistance and assisting with the activation of EMS.

Primary Responsibilities:

  • Ensuring the safety of the scene
  • Assessing the individual’s condition
  • Activating EMS
  • Providing first aid interventions
  • Offer comfort and reassurance to the patient

Become a Responsible First Aider Today!

Chapter 3 Check, Call, Care:

Chapter 3 of the Comprehensive Guide for First Aid and CPR by the Red Cross covers the essential skills and knowledge required to provide effective first aid. Throughout this chapter, you must know concepts like “Check, Call, and Care,” assisting a person with medication, conducting a focused examination, and managing shock.

Check, Call, and Care Approach

This approach is a systematic framework for responding to an emergency. The first thing would be checking the scene for potential hazards and ensuring personal safety before proceeding to help the injured or ill person. After you check the scene comes the patient’s assessment. As a first aid, it is crucial to check vital signs as well as if the individual is responding and breathing. If the patient is responding and has no life-threatening conditions, you can proceed to provide appropriate care based on the patient’s need. On the other hand, if the person is unresponsive or not breathing normally, the first aider must call for emergency medical assistance and initiate CPR.

Assisting a person with medication

There are some situations where individuals require medication to manage a specific condition or emergency, such as an asthma attack or severe allergic reaction. In these cases, first aiders must assess the situation and obtain information about the patient’s medication, following the prescribed plan and assisting them in taking the appropriate dosage.

Focused examination

Another aspect you need to know for the test is the importance of conducting a focused examination. As a first aider, you must learn how to assess injuries and abnormalities while maintaining the person’s comfort and to communicate the situation to emergency medical professionals effectively.

Shock Management

Shock is a life-threatening condition resulting from various medical emergencies such as severe bleeding, trauma, and allergic reactions. First responders should recognize the signs and symptoms of shock and apply their knowledge to manage it while monitoring vital signs before the emergency specialists arrive.

Get Ready to Check, Call and Care in a CPR Training Course

Chapter 4 Choking:

Chapter 4 of the first aid guide equips first aiders with the necessary knowledge and skills to intervene effectively in situations involving choking in adults, children, and infants

Regarding choking in adults, the guide recommends first responders encourage the patient to cough forcefully to dislodge the obstruction. If the person cannot cough or speak, the first aider should perform abdominal thrusts or Heimlich maneuvers until medical help arrives.

For choking in children, the approach differs slightly due to their smaller size and developing anatomy. In these cases, you should encourage the child to cough and deliver back blows and chest thrusts to help clear the airway obstruction.

Choking in infants requires a different approach altogether. The guide points out the delicate physiology of infants; therefore, it is vital to support the infant’s head and neck while delivering back blows and chest thrusts.

Chapter 5 Circulation Emergencies:

Chapter 5 of the First Aid guide provides essential information on responding to heart attacks, strokes and life-threatening bleeding. As a first responder, you must learn how to recognize the signs and symptoms of these emergencies, take immediate action, activate EMS, and provide appropriate assistance.

Heart Attacks

Heart Attack

In general, heart attacks occur when the blood flow to the heart is blocked due to a clot in a coronary artery. The guide mentions several signs and symptoms to help you recognize a heart attack, like chest discomfort, shortness of breath, pain radiating to the arm or jaw and nausea. In a heart attack situation, the first aider should activate the emergency medical services immediately and help the person sit or lie down in a comfortable position. CPR should be started if the person is unresponsive and stops breathing normally.

Strokes

Strokes happen when blood flow to the brain is interrupted. In this section, the guide introduces the acronym FAST, which means Face, Arms, Speech and Time. This acronym is very helpful in remembering the signs and symptoms of strokes: face drooping, arm weakness, slurred speech, and the necessity of acting and seeking medical attention immediately. As in the case of a heart attack, first aiders should activate EMS, help the person get in a comfortable position, and, if the person becomes unresponsive, start CPR.

Life-Threatening Bleeding

Some accidents may cause internal or external injuries with life-threatening bleeding. Therefore, the guide emphasizes the importance of quickly controlling bleeding to prevent severe blood loss and shock. The steps you need to follow to control life-threatening bleeding are;

  • Apply direct pressure to the bleeding site using a sterile dressing or cloth.
  • If possible, elevate the injured area
  • If it’s severe bleeding, use tourniquets or improvised pressure points
  • Monitor the patient’s condition until medical help arrives.

Be a Hero in an Emergency

Enroll in our First Aid and CPR training course and be prepared for any emergency that comes your way!

Chapter 6 CPR/AED:

Chapter 6 of the first aid guide reviews the aspects of cardiopulmonary resuscitation (CPR) and the use of AEDs in emergencies.

CPR speed

As a first responder, you must know that CPR should be performed at the correct speed and depth of compressions. To sit for the first aid exam, remember that the recommended compression rate is at least 100 to 120 compressions per minute. Steady and consistent compressions aim to ensure adequate blood flow and oxygenation to the vital organs.

Compression depth

As per compression depth, the professionals suggest that to generate enough pressure to circulate blood effectively, chest compressions should be at least 2 inches (5 centimetres) for adults and children and approximately 1.5 inches (4 centimetres) for infants.

Compression-to-ventilation ratio

Moreover, the guide highlights that to ensure a balance between providing oxygen to the patient’s lungs and maintaining circulation through chest compressions, you must provide 30 compressions to 2 breaths for adults and children.

AED

Recapturing the chain of survival, early defibrillation plays a crucial role in cardiac arrest cases. Thus, going through the clear instructions on how to use AEDs effectively, including the proper placement of electrode pads, following voice or visual prompts and ensuring the rescuer’s safety and the surroundings, are topics you need to remember in the first aid test.

Finally, the guide sustains the importance of continuous assessment and reassessment during CPR and using AEDs. As first aiders, check signs, responsiveness, and breathing while performing CPR.

Students Certified With Coast2Coast
+ 0

Chapter 7 Breathing Emergencies:

Understanding emergencies is vital for first aiders to intervene promptly and potentially prevent severe complications. Chapter 7 refers to breathing emergencies, focusing on asthma and anaphylaxis.

Asthma

Asthma is a chronic respiratory condition characterized by the narrowing of airways. The guide highlights this condition’s common signs and symptoms, such as wheezing, coughing, shortness of breath and chest tightness. To assist a person suffering from an asthma attack, you should look for their prescribed asthma medication, help them get to a comfortable position and try to remain calm. In the case that the patient’s condition is worsened, activate emergency medical services.

Further, the guide addresses anaphylaxis, which is a severe allergic reaction that can be life-threatening. The signs and symptoms of this reaction could be difficulty breathing, swelling of the face or throat, hives and a rapid heartbeat. For this case, the first aider is recommended to call emergency services immediately and, in the meantime, help the person use their prescribed epinephrine auto-injector, if available.

Take the First Step Towards Being a Hero

Chapter 8 Wound Care:

Regarding wound care, chapter 8 of the Red Cross guide covers many common injuries and conditions that first aiders may encounter, including bandaging guidelines, burns, splinters, nosebleeds, knocked-out teeth, and crush injuries.

This is an essential section for you to review while studying for the First Aid test, and remember the step-by-step instructions on assessing and managing injuries effectively.

Bandaging Guidelines

In this section, the guide highlights the importance of using sterile dressing and applying pressure to control bleeding. As a suggestion, follow the instructions on cleaning and dressing wounds appropriately and securing bandages to provide support and protection.

Burns

Burns can be categorized into first-degree, second-degree, and third-degree burns. The variety of the degrees roots on the severity of the burn, and the guide mentions recommendations for immediate first aid, such as cooling the burn with cold water and covering it with a sterile dressing. As a side note, seek medical attention for severe burns or burns involving sensitive body areas.

Splinters

The guide covers step-by-step instructions for safely removing splinters using tweezers and proper hygiene practices to prevent infections. It also suggests seeking professional medical help.

Nosebleeds

Another point you should write down for your first aid exam is how to manage nosebleeds. According to the guide, you should sit the patient upright, leaning slightly forward and pinching the nostrils together to apply pressure. If the bleeding persists or if there are other concerning symptoms, make sure to seek medical help.

Knocked-out Teeth

For knocked-out teeth, the guide emphasizes addressing the injured patient on time. In these cases, you should carefully handle the tooth without touching the root and preserve it in propolis, egg white, coconut water, whole milk or saline until the patient gets to the dentist.

Crush Injuries

Finally, you should go through the crush injuries section. The guide highlights the importance of removing the person from the crushing force if the object is crushing the person’s head, neck, chest or abdomen. In every case, the first aiders must call EMS while monitoring vital signs.

Head Injury

Be a Wound Care Hero with First Aid Training!

Chapter 9 Head, Neck, and Spinal Injuries:

Head and neck injuries are considered severe because of their relationship with the spine. Thus, chapter 9 presents some common causes of head, neck and spinal injuries and different ways to prevent them.

How to Care for Head, Neck and Spinal Injuries?

The guide lists some steps to manage these types of injuries, starting with restricting the movement of the affected zone until EMS personnel arrive. The individual must stay in the same position where they were found unless there’s an immediate danger. If fluids start coming out of the ear canal or draining from the ear, let the fluid drain and do not move the person; once it stops draining, cover the ear loosely with a sterile dressing.

In some cases, head, neck and spinal injuries are related to brain injuries. Concussions are a type of traumatic brain injury that can occur due to a blow or jolt to the head. Understanding the signs and symptoms of a concussion is crucial if you are planning to sit for the first aid test.

Some common signs and symptoms (may appear immediately after the injury or may be delayed) of a concussion include;

  • Headache
  • Dizzinies
  • Confusion
  • Memory problems
  • Nausea or vomiting
  • Sensitivity to light or noise
  • Changes in mood or behaviour

As first aiders, the guide suggests assessing the person’s condition by asking specific questions about their symptoms and observing their behaviour. It is recommended to keep the person in the same place the accident occurred unless there is further danger and inform immediately to medical professionals. Concussions are serious injuries and should not be taken lightly; the patient should have proper physical and mental rest and avoid activities that may worsen the symptoms.

Be the Difference Between a Tragedy and a Life Saved

Chapter 10 Bone, Muscle, and Joint Injuries:

Regarding Chapter 10, first aid students must remember what to look for in bone, muscle and joint injuries. These injuries’ common signs and symptoms may include pain, swelling, deformity, limited range of motion, and difficulty bearing weight or using the affected limb. When moving or manipulating the wounded limb, every first aider is encouraged to assess the injured area with extreme caution. The injury should be treated using the RICE method:

  • Rest: Limit the patient’s activities and suggest resting the injured body part.
  • Immobilize: Try to immobilize the injured area in the position in which it was found by creating a splint.
  • Cool: To reduce swelling and pain, cool the injured area for 20 minutes every hour for up to 48 hours.
  • Elevate: Keep the injured area above the level of the heart.

Furthermore, the Red Cross advocates that these types of injuries should be treated by applying splints until the person gets medical help. Commercial splints are always the best option, but other improvised splits, such as rolled-up newspapers, magazines or scarves, are helpful too. Also, the guide outlines how to apply and secure splints and the importance of checking for proper blood circulation and monitoring the patient’s condition.

Chapter 11 Sudden Medical Emergencies:

Chapter 11 of the Red Cross guide covers a variety of sudden medical emergencies that you should study for your test, including diabetic emergencies, seizures, mental health crises and childbirth. This section explains how to recognize the signs and symptoms of these conditions and offers guidance on appropriate first-aid responses.

Diabetic Emergencies

As stated in the guide, there are two types of diabetes, hypoglycemia (low blood sugar) and hyperglycemia (high blood sugar). In most case scenarios, diabetic emergencies happen because of an imbalance between two or more exercises, food intake, medication and insulin production. For you to recognize a diabetic crisis, the signs and symptoms are:

  • Changes in the level of responsiveness
  • Changes in behaviour, such as confusion, irritability, or aggression
  • Rapid breathing
  • Cool, sweaty skin
  • Skin that is paler than normal
  • Appearance of intoxication
  • Feeling and looking ill
  • Seizures

If you encounter a diabetic emergency, the guide sustains that the first aider should provide the patient with a source of sugar or assist with their insulin administration. If the person’s condition does not improve within 10 minutes of having sugar, you should call the emergency services.

Seizures

Seizures are episodes of abnormal electrical signals in the brain that result in temporary and involuntary disturbances in brain functions, shaking or contraction of limbs, changes in sensations, shifts in behaviour, and altered levels of responsiveness.

In general, there are many causes of seizures; one is epilepsy, but others can be fevers or infections, head injuries, heat stroke, and poisons. As a first aider, you can tell a person is having a seizure because they will start hallucinating, their eyes may begin rolling upwards into the head, and they won’t be able to control muscle movement.

The appropriate care for an individual having a seizure is creating a safe environment by moving furniture and other objects that could cause injury and, if possible, rolling the person onto their side. If the patient is having their first seizure or if it lasts longer than five minutes, you must inform medical professionals.

Mental Health Crises

In general terms, mental health conditions are difficult to identify; they may go unrecognized unless the person shares the information with you. Some examples of mental health conditions may be panic attacks or acute anxiety

If you ever encounter an individual going through a mental health crisis, try to reduce distractions and encourage the person to sit down to promote conversation. You should use your soft skills to keep the person calm, listening empathetically and acknowledging their feelings and emotions without judgment. If the person poses a risk to you or others, you should call 9-1-1 immediately.

Childbirth Emergencies

As a first aider, you should acknowledge that childbirth is a natural process and the woman’s body knows what to do; your role will be to support the mother’s comfort, recognize signs of complications, and contact emergency medical services for professional assistance.

The signs and symptoms of imminent childbirth include;

  • Contractions that are 2 minutes apart or less
  • The woman says the baby is coming
  • The woman feels the urge to push
  • The woman feels like she needs to have a bowel movement
  • The baby is crowning

How Difficult is it to Pass the First Aid & CPR Exam?

Student Success due to the Support of our Instructors at Coast2Coast 99.9%

Chapter 12 Environmental Illness:

Chapter 12 of the Red Cross guide covers environmental illnesses such as heat and cold-related emergencies. Understanding how to respond to these emergencies is crucial for first aiders to provide immediate assistance and prevent further harm.

A warm/hot environment may cause an individual to experience heat exhaustion and heatstroke. You should look for signs and symptoms of heavy sweating, weakness, dizziness, nausea, confusion and potential loss of consciousness. If you ever encounter an individual with heat exhaustion or heat stroke, the guide recommends moving them to a cooler environment, providing them with fluids and loosening any restrictive clothing. If the person’s condition worsens or if they do not improve after primary care, seek medical assistance.

A cool/cold environment may cause a person to experience hypothermia and frostbite. The signs and symptoms you should look for may include shivering, confusion, slurred speech and loss of coordination. For frostbite, the guide points out the presence of pale or blue skin, numbness and a waxy appearance. If you ever encounter an individual with hypothermia or frostbite, move them to a warm environment, removing wet clothing and providing them with warm, non-alcoholic fluids. If you see that the situation doesn’t get better, call 9-1-1.

Some recommendations for preventing heat and cold-related emergencies are: 

  • Stay hydrated
  • Wear appropriate clothing
  • Avoid prolonged exposure to extreme temperatures
  • Monitor people in high-risk situations, such as athletes, outdoor workers and the elderly.

Keep Friends & Family Safe This Summer & Winter

Chapter 13 Poisons:

Finally, chapter 13 of the guide for first aid and CPR covers important topics related to poisons, how to recognize the signs and symptoms and what to do as a first aider.

According to the Red Cross, a poison is a substance that harms the body if it is inhaled, swallowed, absorbed or injected and can be life-threatening if they affect breathing or circulation.

There are four types of poisons;

  • Swallowed Poison: Enters the body through the mouth, lips, esophagus or stomach. E.g. drinking bleach.
  • Absorbed Poison: Enters the body through the skin. E.g. plants or chemicals.
  • Injected Poison: Enters the body through bites, stings or needles.
  • Inhaled Poison: Is breathed into the body. E.g. carbon monoxide.

Moreover, the guide recommends preventive measures to avoid poisoning emergencies, such as keeping medications out of the reach of children, wearing appropriate protective clothing while manipulating poisonous substances, run gas and other combustion engines only in open areas, among others.

If the poisoned individual is not breathing, it is recommended to start CPR taking the proper measurements so you don’t contaminate yourself with the poison. If the poison was absorbed through the skin, wash the area with water for at least 15 minutes and remove any clothing covered with poison. In every case scenario, encourage the individual to seek medical attention and call the EMS personnel.

Tick Bites

Tick Bites

The guide covers bites and stings from numerous animals and insects, but you should pay special attention to the tick bites while studying for your test. Ticks can be found in wooded, bushy areas, tall grass, and leaf litter on the ground; they can attach themselves to any warm-blooded animal that comes in contact with them. These insects can cause serious illnesses, such as Lyme disease.

The guide emphasizes the safest way to remove attached ticks is using tweezers, grasping the tick by the head as close to the skin as possible and pulling upward slowly and steadily without twisting until the tick releases its hold. Afterwards, wash the area with clean tap water to clean the wound. Save the tick in a resealable bag and record the bite date. Suggest the person monitor the bite for several days in case it gets infected and recommend the person seek medical attention.

Snakebites

Usually, snakes live in rock outcrops, swamps, undergrowth and abandoned human structures. Most Canadian snakes are non-venomous except for the Northern Pacific Rattlesnake, Massasauga Rattlesnake and Prairie Rattlesnake.

To prevent snakebites, the guide suggests wearing proper footwear, watching where you put your feet when hiking, and not aggravating a snake. If someone gets bitten, you will notice a pair of puncture wounds in the skin, localized redness of the skin and pain and swelling in the area of the bite. 

The steps to follow in a snakebite emergency are:

  1. Keep the injured site still and level with the heart.
  2. If the bite is on a limb, remove any jewellery before it swells.
  3. Wash the wound with water.
  4. Cover the bite with a clean, dry dressing.
  5. Call 9-1-1 and get an AED if possible.

There may also be additional questions specifically about the Red Cross if you complete your training with Coast2Coast or another Red Cross training partner. Keep in mind that tests do change and course material may be updated as the years go by. First Aid and CPR skills do evolve over time and professionals learn new and improved techniques to help save lives. This is why it is important to complete Recertification courses!

Conclusion

Candidates who plan to complete their training with us at Coast2Coast will learn a wide variety of life-saving skills. Upon successful completion, you will receive a Canadian Red Cross Certification. Once they earn their certificate, they will be ready to use their life-saving skills! Keeping up-to-date with first aid training helps to ensure that responders are aware of all the latest tips and techniques required to help people in all types of emergencies.

So what are you waiting for? Get registered for a First Aid and CPR training course today at one of our training facilities in Ontario.

Register for First Aid & CPR Training

Choose from any of our locations across Ontario or Alberta and gain the knowledge and skills to save a life!

Can You Teach Yourself How To Swim?

can you teach yourself how to swim

As Canadians, most of us like to visit beaches, lakes, and swimming pools especially in summer time. Afterall, we don’t get too much of the warm weather so we would like to take full advantage of it. 

Here at Coast2Coast swim, we are extremely passionate about swimming and all water activities; and we encourage everyone to also get involved with these activities. Swimming has always been one of the best ways to stay in shape for people of all ages, to stay active, and finally a fun activity to enjoy no matter if you are by yourself or with friends and family. That is why we take pride in teaching our community how to swim and stay safe in and around water. 

Coast2coast Swim offers a variety of options from public swimming classes, to private at home (mobile) swimming lessons. This allows our customers to find the most convenient and cost efficient. 

However, the question we get from time to time is “can you teach yourself how to swim?”

In short, yes. But you should know that we strongly suggest for you to sign for a training or class either at Coast2Coast swim or another reputable swimming school. This is to make sure you learn the fundamentals of swimming in the right way and that you can enjoy the water in a safe manner at all times.

A person in a black and yellow swimsuit is swimming on their back in a clear indoor pool, with arms extended overhead. The water is calm, and lane markers are visible in the background.

Teaching Yourself to Swim

Here is our suggestion on how you can try to teach swimming to yourself. Please be aware these are only suggestions and we can not guarantee your safety or skills. Swimming can be challenging. Here we go:

Start practicing your swimming in a safe environment like the shallow end of a supervised swimming pool. Never go to the deep end of the pool or swim in moving water without supervision. If you are tired, don’t practice.

The easiest stroke to learn is the front crawl. Once mastered, you can learn the three other strokes – backstroke, butterfly, and breaststroke.

1. The First Step

Standing with your back against the pool, take a deep breath, lean your waist until your face is completely in the water and your ears are at the waterline. You must hold this position for 2 seconds before turning your head to one side, exhaling into the water. Now you can return to the starting position. Practice doing this a few times.

2. Learning to Inhale and Exhale

Start by holding your arms out to your side, fingers together and palms down. Now, take a deep breath, lean forward, and placing your face in the water, bring your right arm up and out of the water to your front.

As your hand contacts the water, pull your arm straight down, making a circular motion underwater and taking your hand behind you and to your right side. At this point, your palm should be facing up. Without lifting your head, turn it to the right and draw a new breath through your mouth. Now turn your head back and exhale through your mouth or nose with your face in the water.

A swimmer wearing a yellow cap and goggles is performing the butterfly stroke in a bright blue swimming pool. Water splashes around as they advance, showcasing dynamic motion and focus.

3. Practicing the Strokes and Breathing

Aim to practice the stroke and breathing exercise until you can complete one stroke with each arm and one complete breath without needing to lift your head out of the water. The idea is stroke – stroke – breath. When swimming, your arm movements propel your body, while kicking your legs prevent you from sinking.

Keep your strokes regular, and avoid looping underwater because once you are swimming, you will have to work harder to cover the same distance. The closer your body is to the surface, and the flatter it is, the less work you must do. Additionally, when you bring your arms out of the water, a flat circular motion helps save more energy than bringing them overhead.

4. Learning to Kick

Facing the side of the pool, place both your hands on the edge and extend your arms. Lift both your legs together until your arms, body, and legs are facing away from the edge in a straight line. Turning your head to one side, draw a breath through your mouth without lifting your head straight up.

With your knees held straight, kick your legs quite fast from the hip, making the smallest possible splashes. At no point should your feet come out of the water. While you are doing this, exhale underwater, as you learned earlier. Continue practicing kicking and breathing until you are comfortable doing both simultaneously.

Five children smiling and playing at the edge of a swimming pool, with water splashing around them. They are lying on their stomachs in the shallow water, showing joy and excitement in a bright, sunny setting.

5. Going to the Opposite End

You are now ready to go across the shallow side of the pool. Facing across the shallow end, stand with your back to the side of the pool. With bent knees, extend your left arm to the front, and taking a deep breath, let your legs help push you from the side. At the same time, put your head in the water, taking a forward stroke with your right arm as your legs start kicking.

6. Achieving Width Lengths

Now you can continue kicking, while also concentrating on your strokes and breathing. Make sure you are bringing each hand back to your side as you reach out to make a stroke with your other hand. As mentioned earlier, your swimming pattern should be a stroke with each arm and then a breath. Practice this until you can swim the whole width of the pool without needing to stop.

We hope this was helpful to you. If you are looking to learn these skills faster and better, contact Coast2Coast Swim to find out more about all our options. Our dedicated instructors have been teaching for close to 20 years and have taught thousands of students throughout the years.

Once again, be aware that the practices mentioned in this blog are only suggestions and we can not guarantee your safety or skills. 

Enjoy your Swim.

Dive into fun with Coast2Coast's Mobile Swimming Course!

Whether you’re a beginner or looking to improve your strokes, we bring the pool to you! Sign up today and make a splash this summer!

What Qualifications do I need to be a Security Guard?

what qualifications do i need to be a security guard

There are many reasons why you may choose a career as a security guard in Canada, and it certainly is an exciting and rewarding job. But you may ask yourself, “what qualifications do I need to be a security guard?” Becoming a licensed security guard requires you to meet specific criteria.

What work does a security guard do?

Depending on the industry you are hired in, your role as a security guard may vary. Tasks include:

  • Securing premises by patrolling and monitoring. Often you may need to monitor the premises via closed-circuit television (CCTV).
  • Guarding cash or valuables in transit in a security vehicle, moving between locations.
  • Securing airports, hospitals, and other public and private places by guarding boundaries, searching aircraft, monitoring passengers and luggage.
  • Supervising entrances of large organizations.
  • Private bodyguards, protecting one or a group of people.

What do you need to get a security guard license?

Throughout Canada, training is one of the most important components for getting a security guard license. Once you complete the required hours of training, you write a test which you must pass. On receiving your results, you can apply for a security license. The requirements are almost the same for each province but check before taking the steps to obtain your license.

1. Requirements for becoming a security guard

You don’t need any specific academic qualifications to become a security guard, but you do need a good standard of education. Your role as a security guard will require that you are more than just being fit since you need to meet certain responsibilities that require basic math, reading, and writing skills. Therefore, a high school diploma is a basic requirement if you are seeking an entry-level security job.

To qualify, you need to be over the age of 18 and must pass criminal record and identity checks. You must also be able to work legally in Canada.

A security officer wearing a mask and gloves speaks with a traveler, also wearing a mask, at an airport security checkpoint. The traveler is holding a suitcase and a laptop tray. Conveyer belts and security equipment are visible in the background.

2. Training requirements

If you are an applicant for a security and bodyguard license, you must complete a proper training course for security guards. This training is available in an online format through Coast2Coast, several colleges, and private law enforcement schools.

According to the Ministry of Community Safety and Correctional Services, a 40-hour Security Guard Preparation Course is mandatory. This can also be taken online. The course must contain 12 modules, including an introduction to the security company world, the code of conduct, and other basic procedures. The course also includes report writing, health and safety, emergency response, Canadian legal system, legal authorities, effective communications, sensitivity training, use of force theory, and first aid certification.

In addition to your Security training course, you must also be certified in Emergency First Aid & CPR/AED Level C. Enroll in a Security License training with Coast2Coast and receive a $10 discount on your First Aid training!

3. Applying for and writing the test

Once you complete your required training hours, you will receive a Training Completion Number (TCN) which you will use to book and write the Ministry approved Security License test. The key to passing the exam is to go there prepared, so use all the resources available to you to study for the test. Every province has a website where you can see what the passing grade requirements are for each one. At the exam, you must provide valid identification, and the test is typically 75 minutes long.

A man in a white shirt is seated at a desk, monitoring security footage on multiple screens. He holds a walkie-talkie, appearing focused on the surveillance images displayed in front of him.

4. When can you start working as a security guard?

You will be notified immediately after you pass the exam, and a copy of your security guard license is mailed to you. We recommend that you ask for a digital copy of the license, allowing you to work immediately. The mailed copy usually takes about eight weeks to arrive.

5. Career prospects

As a security guard, you have plenty of opportunities to progress in your career by obtaining credentials that will reinforce your knowledge in various areas. Most certifications require a certain number of work hours before writing the test to qualify. Additionally, there are also requirements for renewing a license every two years, always on your birthday.

Remember: It is important to always carry your license with you when on duty.

A security guard in a uniform with a badge stands smiling inside an office, arms crossed. Two computer monitors are on a desk beside him. The background is a plain, light-colored wall.

Register for a Security Guard License

Coast2Coast First Aid & Aquatics offers Security License training in Ontario in association with one of our ministry approved training partners! Start your path to becoming a security guard and enroll in the necessary training today!

Can You Do A First Aid Course Online?

can you do a first aid course online

First aid training has become essential for everyone. This training helps you ensure the safety of your loved ones and those around you, whether you need it for work or just as a safety precaution.

Nowadays, most of us are used to doing just about everything online, including our shopping, banking, and even workouts. Can you do a first aid course online, though? The answer is yes! Online first aid training is a great way for you to learn essential life-saving skills to help anyone in a moment of need.

How Does Online First Aid Training Work?

Just like you wear your safety belt when you are in a vehicle, or make sure to have a first aid kit at home in case of a serious injury, first aid training is a measure that prepares you to use your skills if they are ever needed.

Each online First Aid & CPR/AED course at Coast2Coast has different modules developed to cover the knowledge you need to offer important life-saving skills in an emergency. Upon completion of each module, the coursework ensures that you have a complete understanding of the subject matter covered.

Once all the modules of the course are completed, you will receive a temporary certificate from the Canadian Red Cross. Online course certificates are valid for 90 days. If you wish to receive an official WSIB approved certificate from the Canadian Red Cross, you will need to upgrade your training and attend an in-class session as well.

Please keep in mind that no First Aid & CPR/AED training course can be fully completed online. Students are required to practice hands-on skills such as CPR, bandaging, etc. to receive an official certificate.

Each step of the Coast2Coast online course is easy to follow. The course modules consist of interactive components, videos, and games with a variety of training materials.

Two people practice CPR on a mannequin. One applies chest compressions, while the other handles an automated external defibrillator with illustrated instructions.

Benefits of Online First Aid Training

There are several benefits to doing an online training course:

  • Save money
  • Save on commuting and travel time to a training facility
  • Easy access from any device, whether you use a desktop, tablet, or smartphone

However, the online-only certificate will not be accepted for your workplace on its own. If you need a Workplace Safety and Insurance Board (WSIB) certificate, you can upgrade your All-Online training with an in-class training session. This must be done within 90 days of completing the online course.

Benefits of Completing the Blended First Aid Course

The Online Blended Course, allows you to receive the full WSIB Red Cross Certificate accepted by your workplace. This course has an online component and includes an in-class session.

The online section of the course covers the theoretical knowledge required through various interactive lessons. The benefits of this are that you can complete this section of the course at your own pace.

During the in-class session, you get to practice the hands-on skills. These include CPR/AED and all the first aid techniques of your course.

A person wearing blue gloves is wrapping a beige bandage around another person's hand. The person receiving care is seated, wearing dark pants. The focus is on the hands and bandage.

Importance of CPR/AED Training

CPR or Cardiopulmonary resuscitation is a life-saving technique that can help you save lives. In an emergency, the techniques you are taught allow you to help the victim of a cardiac arrest maintain blood flow to the heart and brain.

If a person cannot breathe for between four and six minutes after the heart stops, they are considered brain dead. When you know how to administer CPR, you can help resuscitate a person until professional help arrives. The critical components of learning CPR are appropriate hand placement, consistency of chest compressions at an adequate rate and depth, and the avoidance of excessive ventilation.

CPR and the use of an automated external defibrillator (AED) can triple the chances of saving the life of a cardiac arrest victim.

Five people are seated on the floor around a CPR mannequin. One person is demonstrating chest compressions, wearing gloves. A red first aid kit is nearby. The group is in a well-lit indoor space with a tiled floor.

How Do I Get a CPR Certification in Toronto?

At Coast2Coast, we offer courses in many locations. Our Toronto facility is located at 635 A Bloor St W, Second Floor, Toronto, ON M6G 1K8. Visit our website to find out more about our First Aid courses, whether you are interested in an Online or a Blended First Aid Course.

Register for First Aid Training

Register today for a First Aid Training course and learn how to deal with emergencies and keep your loved ones safe! Check out our facilities and book your spot now.

Is Swimming Hard to Learn? Tips & Safety Advice

A swimmer wearing a swim cap and goggles adjusts her gear while standing in a pool. The water level is midway up her body, and she appears to be focused. The background shows a clear blue sky and some buildings in the distance.

According to the WHO, drownings account for 7% of all injury-related deaths, making it the 3rd leading cause of unintentional injury death globally. Therefore, swimming is more than just a way to keep fit or for enjoyment, it is an essential skill. Learning swimming is crucial for safety and fitness. But is swimming hard to learn?

Swimming is an easier skill to learn for people with exposure to water, making it more difficult for people without aquatic exposure to master. A fear of water is one of the main reasons many people don’t learn how to swim, but it is not a difficult skill to learn. Moreover, children can learn to swim from a very young age.

Best way to learn to swim

The best way to learn to swim properly is to join swim lessons, such as a beginner’s swimming class or private swimming lessons. Besides your swimming lessons, it is also a good idea to get lots of practice, allowing you to perfect your strokes and breathing techniques. Practicing holding your breath underwater is a crucial exercise in swim lessons. When learning to swim, you need a sense of calm and to avoid fighting with the water. Remember, it is important to have someone there to assist you if necessary when you are learning how to swim. Do not swim alone.

With children, the best time for them to start learning is around the age of 1. They are taught the basic survival skill of floating first, and then how to build their confidence around the water. Thereafter, they start learning other swimming elements. Children are fast learners.

A swimmer wearing goggles and a swim cap performs a freestyle stroke in a swimming pool. The pool is divided into lanes with blue, white, and red lane dividers. The water is clear, and the swimmer is in the middle of a stroke with one arm extended forward.

Register for Mobile Swimming Lessons

At Coast2Coast, we provide Mobile Swimming lessons in the Greater Toronto Area! Inquire about our Mobile Swimming program today and gain confidence in your swimming skills.

How long will it take to learn to swim?

Usually, for kids, learning to execute a good swimming style and completing laps requires 15 to 30 hours of swimming instruction. For adults, the learning process to reach the same level can take anywhere between 20 to 40 hours. Of course, these times may vary, depending on any previous experience and the type of instruction you are receiving.

It may take a few weeks of consistent practice to master swimming techniques. The more you practice, and the faster you overcome your fear of the water, the quicker it is to master swimming. Then, there are different levels of expertise, from competitive swimmer to professional swimmer.

Why is swimming more difficult for some people to master?

The popularity of swimming is undeniable, and we all envy the swimmers, like Michael Phelps, we watch at events like the Olympics or swimming competitions. Swimming has unique challenges compared to other sports due to its specific physical demands, such as restricted breathing and the horizontal position of the body. It is more than just a pleasurable sport to watch, but has plenty of health benefits.

It can feel like quite a feat to learn how to swim if you fear the water or haven’t mastered the art of staying afloat. One of the greatest forms of anxiety that could hold you back from learning is the fear of drowning.

A baby in a pink swimsuit is held up in a swimming pool by an older woman with gray hair and a black-and-white striped swimsuit. A younger woman with brown hair smiles in the water next to them, all enjoying the sunny day.

Challenges beginners need to overcome when learning to swim

There are several challenges you will need to overcome as a beginner:

  • Anxiety

If you are tense and anxious, then it becomes very difficult to learn to swim. Anxiety leads to harsh movements that don’t allow the body to glide through the water, leading to it being dragged down. Practice your movements and keep them streamlined to help you glide through the water.

  • Breathing

Learning to breathe properly is the most challenging swimming technique. You need to practice syncing your breath with your strike and exhaling through your nose underwater. Swimmers breathe differently compared to land-based sports, which can add to the difficulty. This takes practice, but it’s not impossible to learn.

  • Coordination

Pulling and kicking are techniques that work in combination to create the perfect stroke when you swim but as a beginner, these are often difficult to coordinate. Practice by breaking down the stroke, and learning it over shorter distances until you get the timing and execution right. Focusing on one skill at a time can help you progress faster.

  • Overthinking the technical elements

The combination of elements that give you propulsion requires smooth execution so your body can glide in the water. If you are overthinking all these techniques, you will fall into an unnatural rhythm that can look mechanical. Practice all the technical elements, such as front crawl or butterfly stroke, until they become second nature. Mastering one stroke can make it easier to learn other strokes.

An elderly woman helps a young girl loose fear of the water while two children, dressed in swimwear with goggles and swim caps, stand nearby. They are indoors with large windows showing a cityscape in the background.

Swimming Lessons for All Ages!

It’s never too late to learn how to swim. If you have access to a pool, we can teach you! Contact us today to set up your mobile swimming lessons.

The Road to Become a Proficient Swimmer

The swimming learning process is essential for developing a strong swimmer, especially for older children interested in competitive swimming. Typically, this journey begins in a pool, where the first five lessons focus on foundational skills. During these initial sessions, a good coach emphasizes safety and comfort in deep water, gradually introducing techniques that make swimming efficient and enjoyable. In just two weeks, children can progress significantly, learning to float, kick, and perform basic strokes. As they master these skills, the next point in their learning process at the pool is building endurance and refining technique. Through regular practice, they develop confidence and strength, paving the way for more advanced swimming techniques. The combination of structured lessons, consistent feedback from a coach, and supportive practice creates an effective learning environment. This foundation not only prepares them for competition but also instills a lifelong love for the water. Ultimately, the swimming learning process transforms beginners into proficient swimmers, ready to tackle more challenging aspects of the sport while ensuring they are safe and confident in their abilities.

Where to learn to swim?

If you live in Ontario, our swim school at Coast2Coast is a great place to learn how to swim regardless of age or skill level. Swimming engages the upper body muscles, providing a full-body workout. We offer a wonderful Mobile Swimming program for those who have their own pool. Mobile Swimming makes it easy for students to learn basic or advanced swimming laps. Simply choose a date and time and we will send one of our experienced instructors to your home, community centre or local YMCA.

You may choose a private, semi-private or group swimming lesson. This makes it easy for you or a small group to learn how to swim. Our lessons are adaptable for either adult learners or new swimmers. Registration is simple and may be achieved by calling our toll-free number: 866-291-9121.

Final Word

Learning to swim is one of the most important survival skills you can acquire. It not only empowers you to stay safe in and around water but also opens up a world of recreational opportunities. Swimming is a low-impact and aerobic sport, making it accessible for individuals of all ages and fitness levels. Whether you’re a child eager to dive in or an adult who has always wanted to learn, it is never too late to start!

To enhance your learning experience, consider enrolling in lessons with a qualified instructor who emphasizes safety and proper technique. Remember to practice in a controlled environment, like a pool, where you can build confidence and skills gradually. Safety should always be your top priority—never swim alone, and always be aware of your surroundings. Additionally, practicing relaxation techniques can help ease anxiety in the water. Embrace the journey of learning to swim; not only will you improve your physical fitness, but you will also gain a sense of accomplishment that lasts a lifetime.

A smiling child wearing a green swim cap and pink goggles rests on the edge of a swimming pool. The water is a bright blue, and the child appears to be in a swimsuit, enjoying their swimming lesson in the pool.

Practice Swimming Skills With a Certified Instructor

Whether you’re a beginner, intermediate or an expert, our swimming instructors are here to help you! Practice any of your swimming skills with a trained swimming instructor. Our swimming programs are tailored to YOU!